
Restaking Deposit Guide
Before You Start
Prerequisites:
- Solana wallet connected (Phantom, Solflare, etc.)
- Sufficient assets for deposit (e.g. SOL or JitoSOL)
- Small amount of SOL for transaction fees
- Understanding of restaking risks and two-epoch withdrawal cooldown
Important Reminders:
- The (re)staking protocol charges a 4% fee on rewards and 0.1% (10 bps) withdrawal fee
- Individual vaults may have additional deposit, withdrawal, and reward fees
- Operators may also apply fees for their services.
- Program fee of 0.10% also applies on withdrawals (as shown in interface)
- Start with small amounts to learn the interface and mechanics
- Always check vault-specific fee structures before depositing
Step 1: Access the Restaking Interface
- Navigate to jito.network/restaking/
- Click "Connect Wallet" in the top right
- Select your wallet type and approve connection
- Ensure you're on the correct network (Solana mainnet)
Step 2: Choose Your Approach
The (re)staking interface provides a convenient toggle to switch between two deposit approaches:
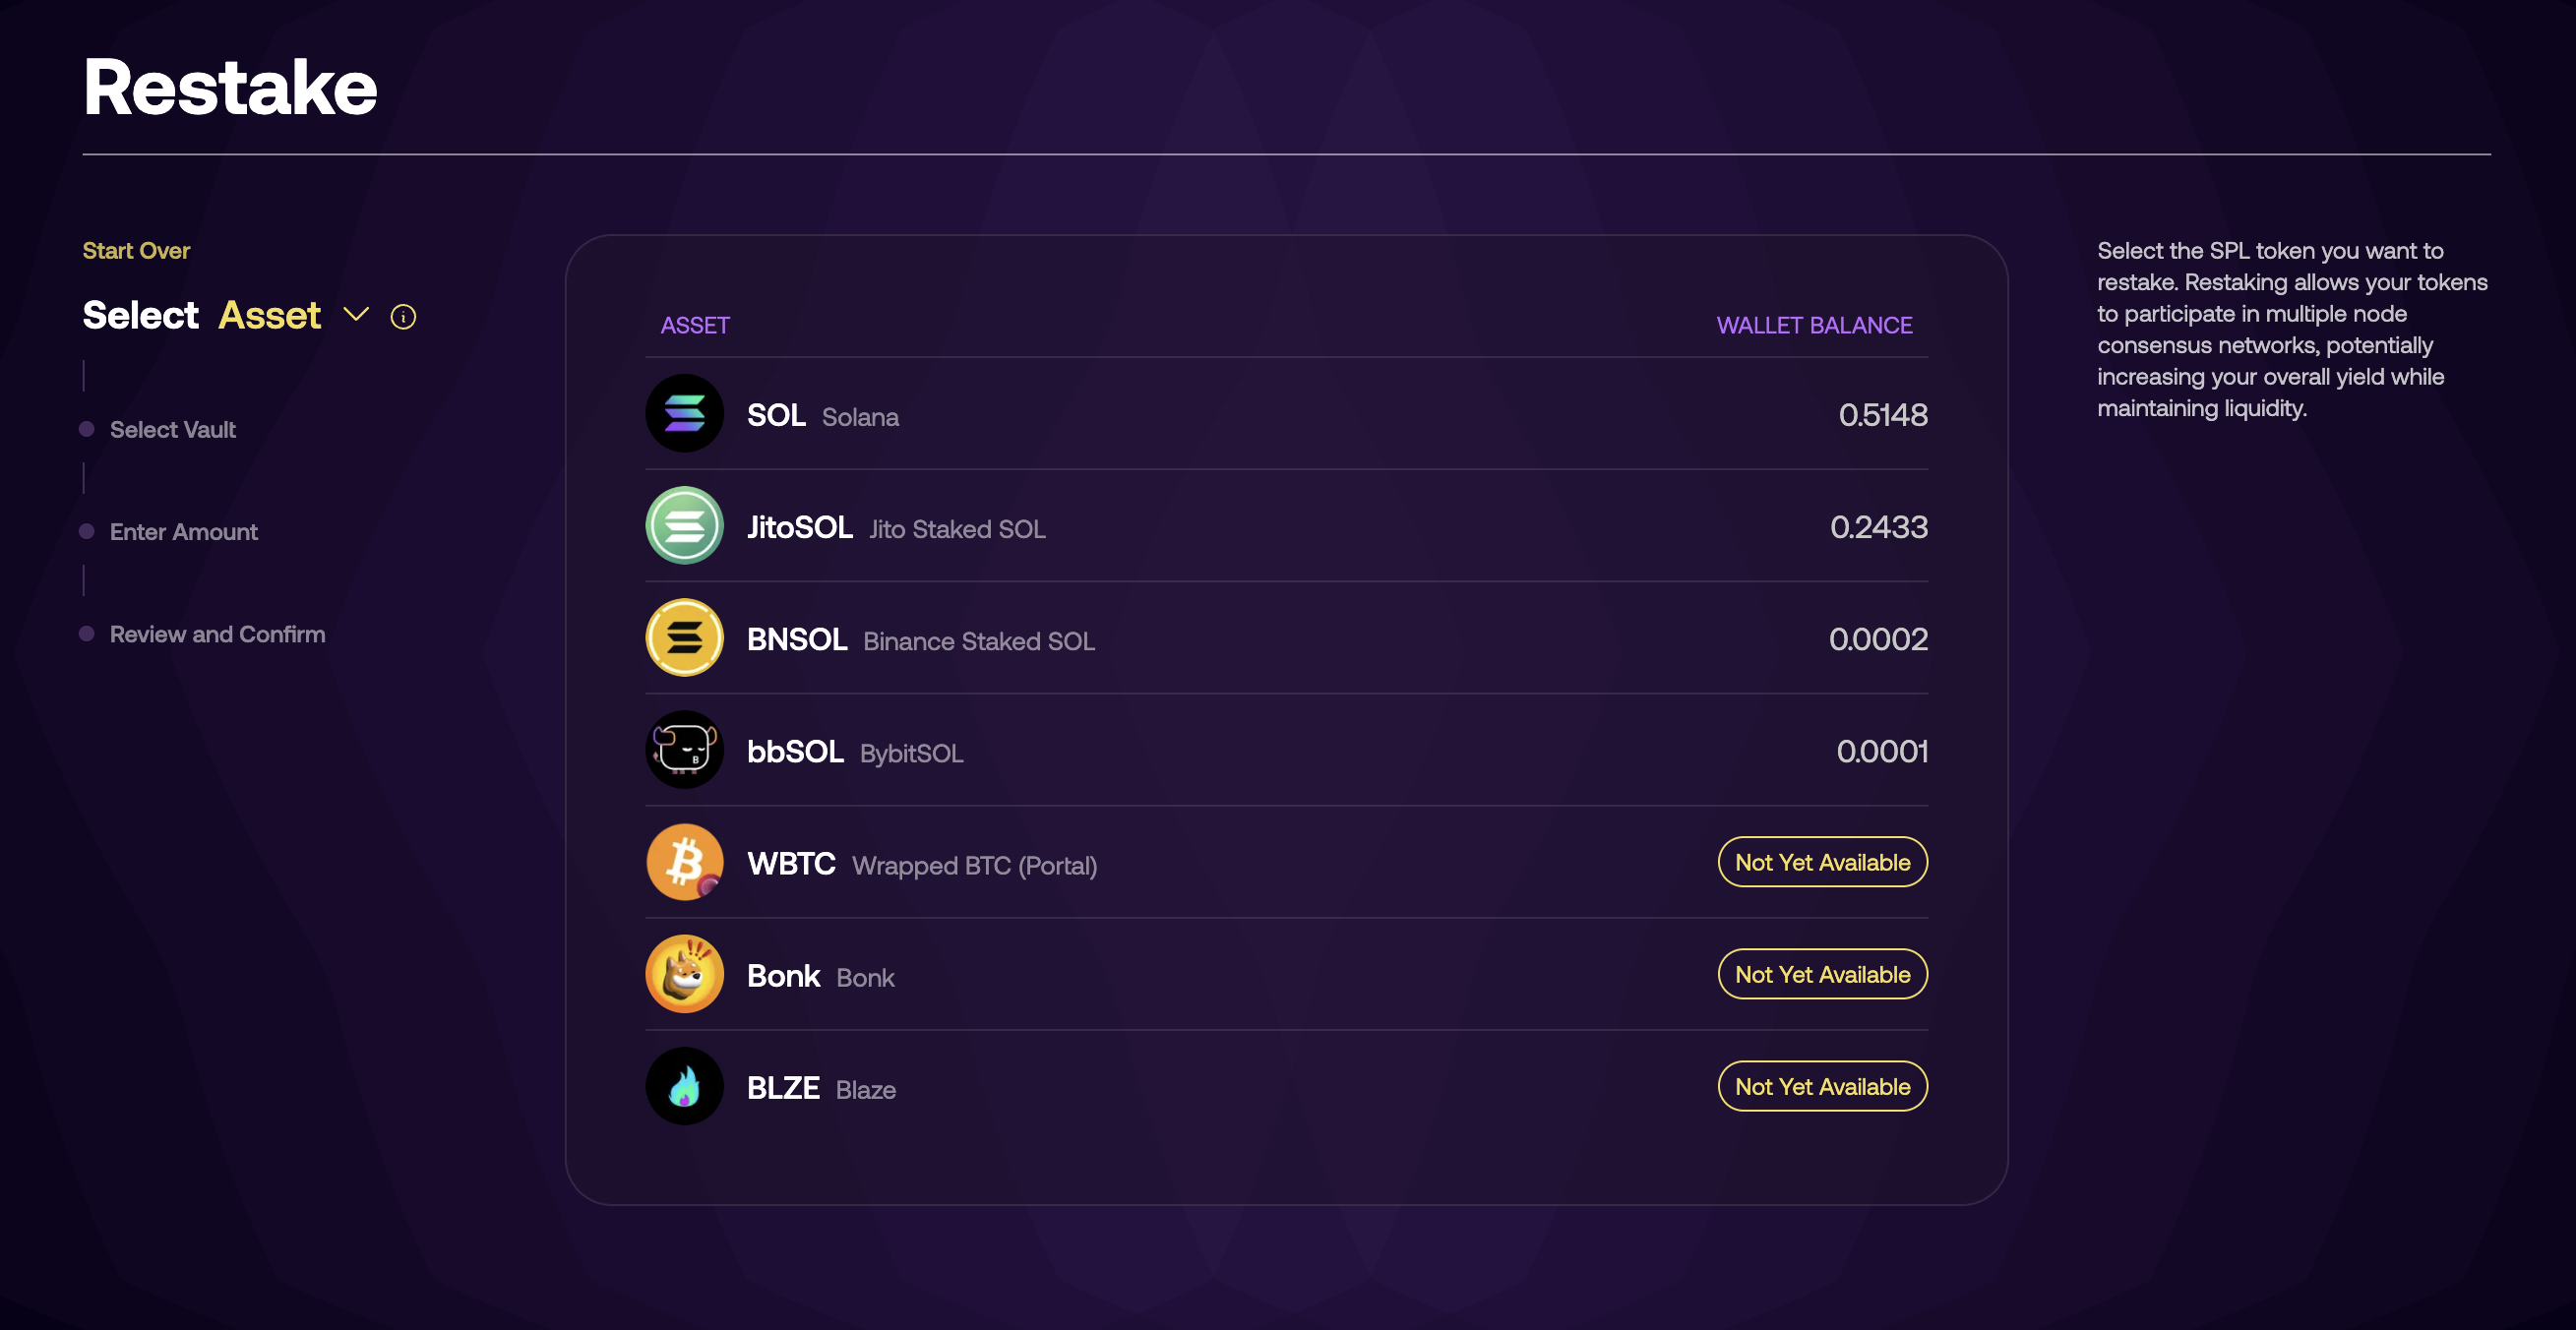
Path 1: Select Asset First (Tokens Tab)
- Choose your token (SOL, JitoSOL, etc.) from your wallet
- Browse vaults that support your selected asset
- Compare strategies and expected returns
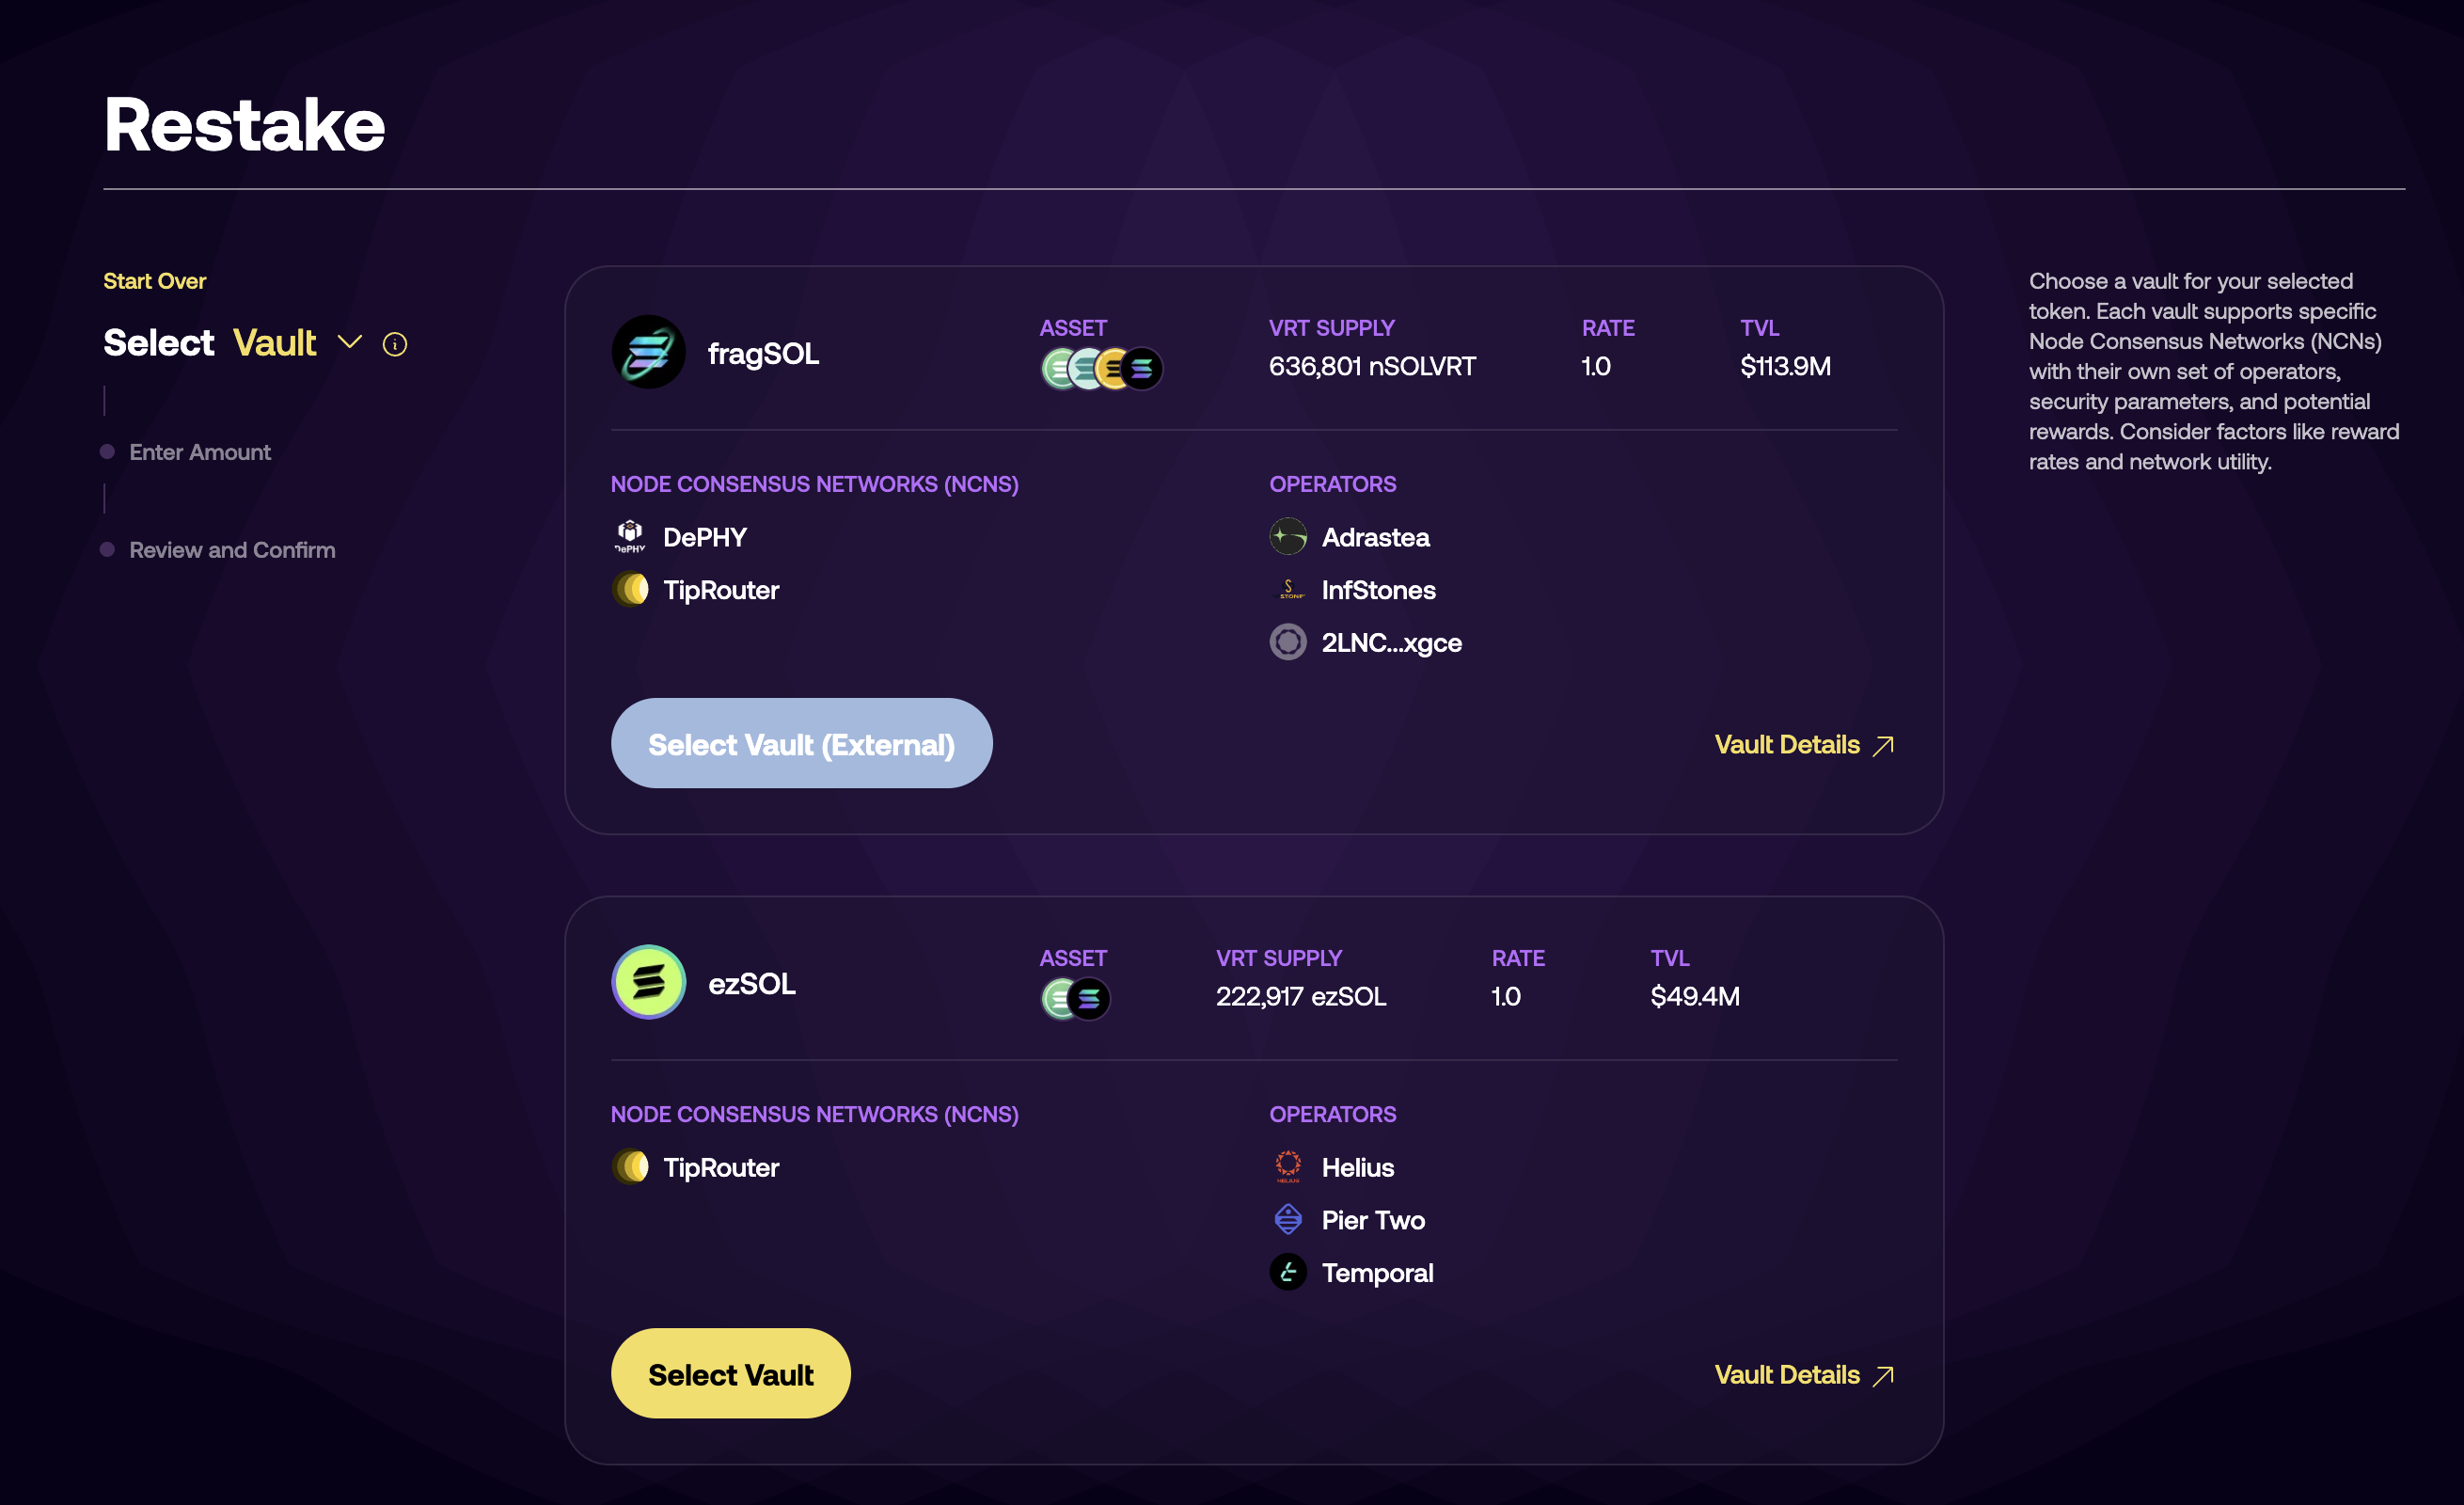
Path 2: Select Vault First (Vaults Tab)
- Browse all available vaults and their strategies
- Choose based on NCNs, operators, and risk profile
- Deposit any supported asset into the selected vault
Vault Selection Criteria:
- Strategy Type: Single vs multi-asset support
- Risk Level: Conservative (established) vs aggressive (newer NCNs)
- Supported Assets: Ensure your tokens are compatible
- Fee Structure: Compare deposit, withdrawal, and reward fees
- Performance: Review current and historical returns
Key Vault Information:
- Current reward sources (base staking + NCN rewards)
- Vault capacity and current utilization levels
- Underlying NCNs (oracles, bridges, L2s) and their operators
- Security audit status and vault age/maturity
Step 3: Choose Your Vault
For Beginners:
- Look for established vaults with proven track records
- Choose single-asset vaults to start (simpler mechanics)
- Prefer vaults with longer operational history
- Avoid experimental strategies or newly launched NCNs
Vault Details Page:
- Click on a vault to see detailed information
- Review strategy explanation and mechanics
- Check recent performance and metrics
- Read risk disclosures carefully
Step 4: Enter Deposit Details
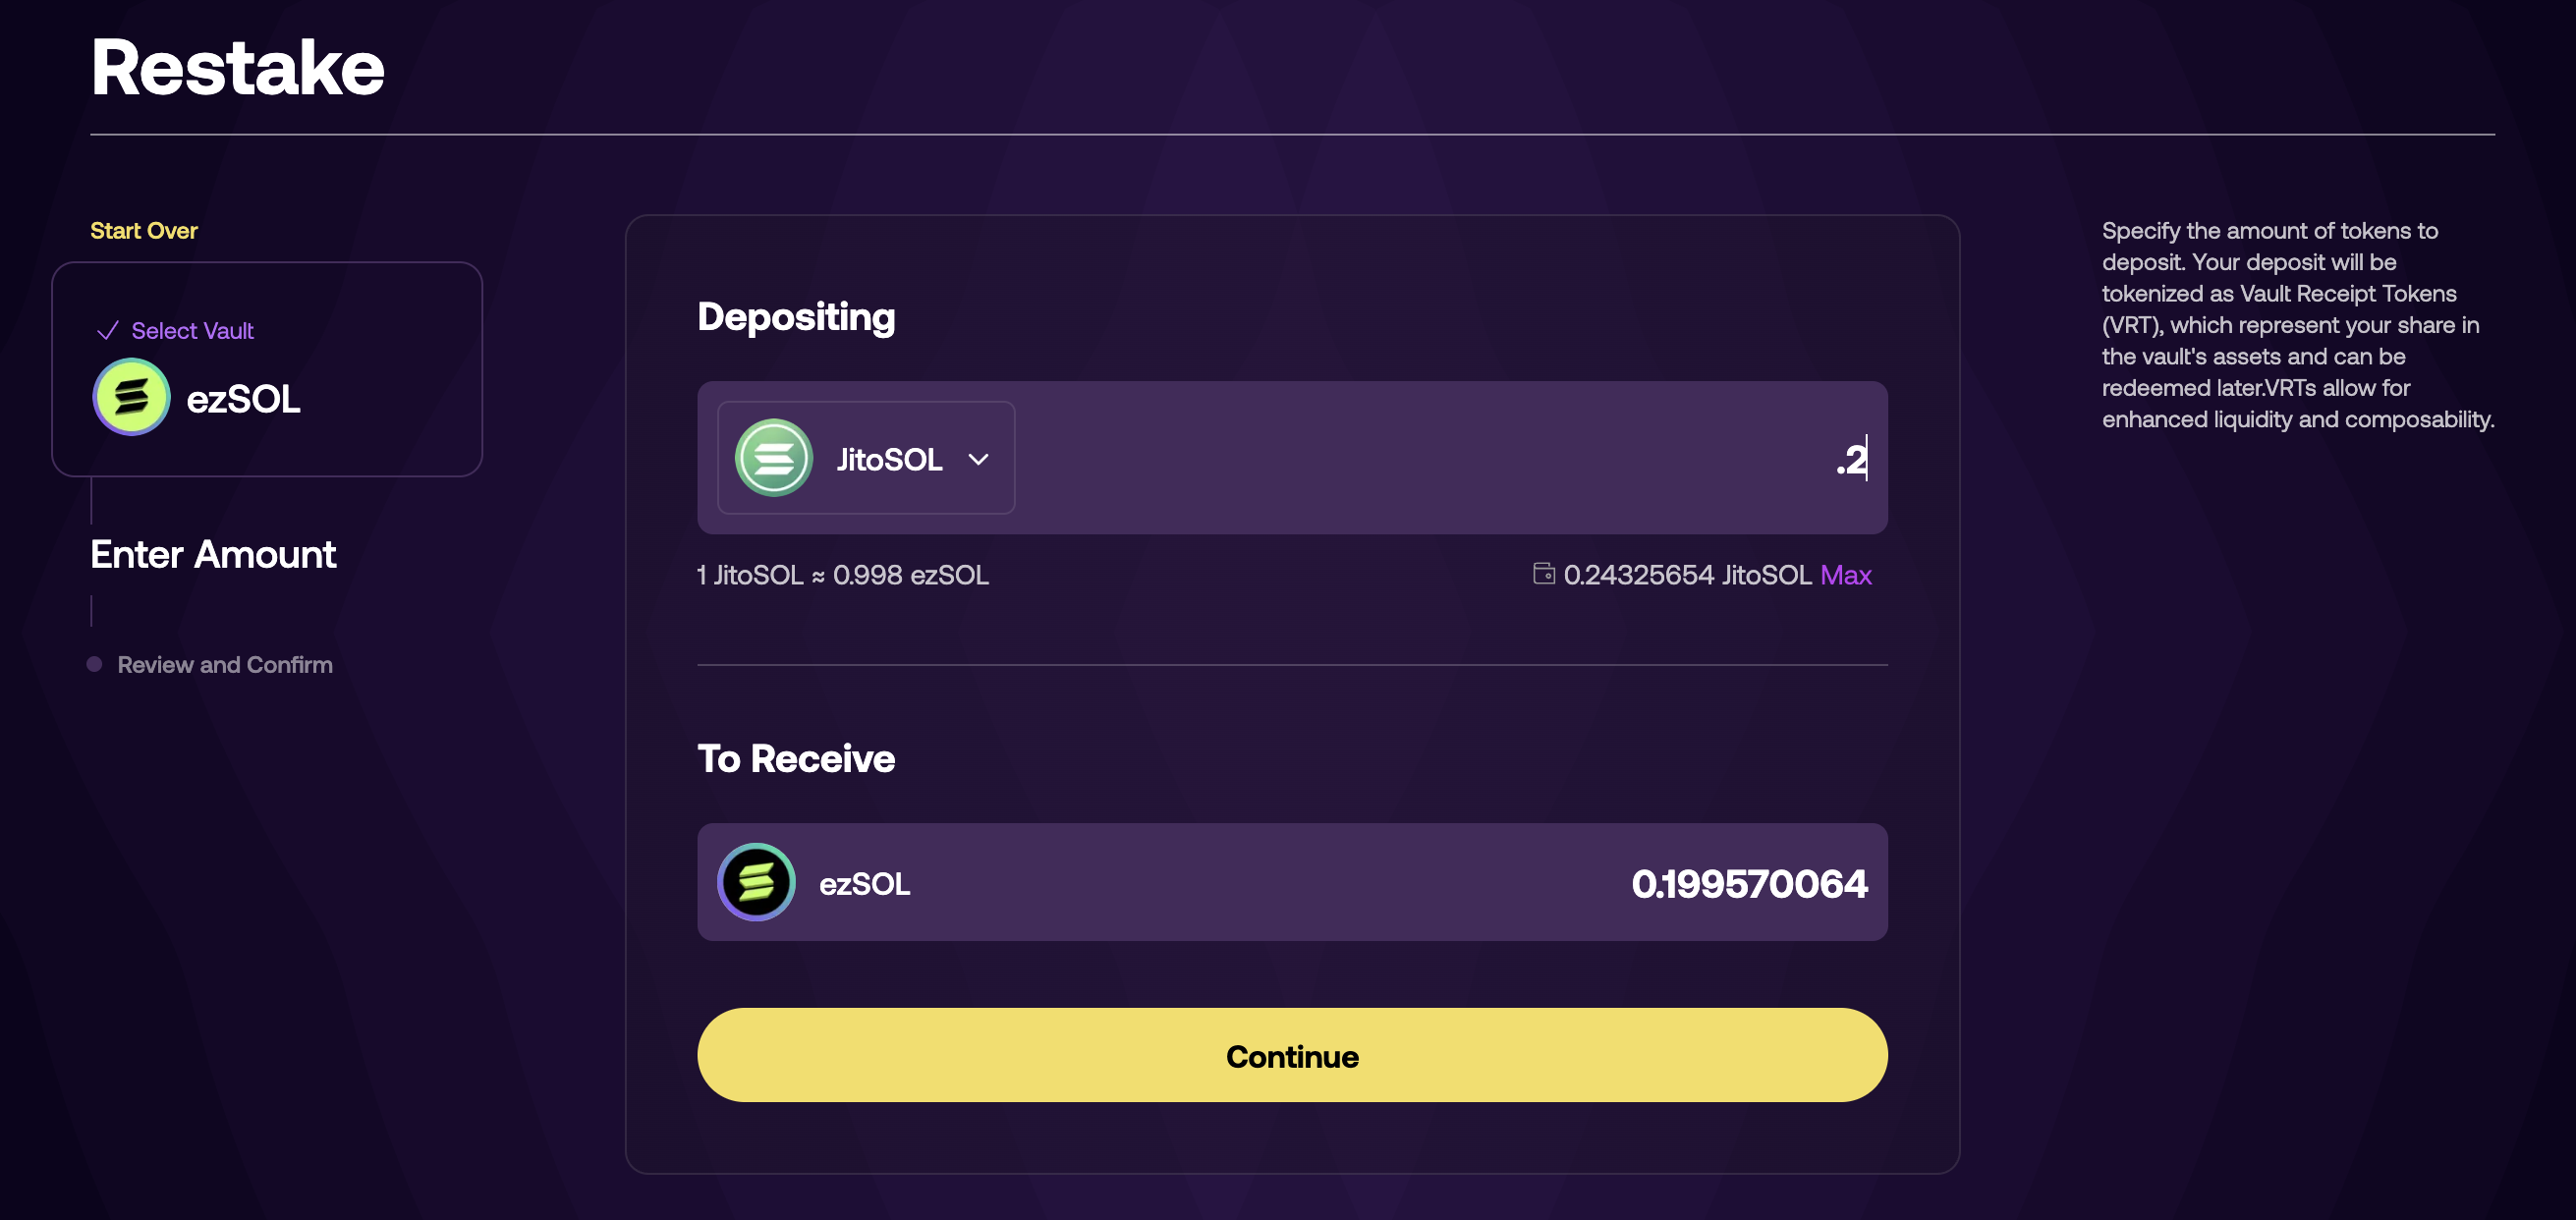
Specify Deposit Amount:
- Enter the amount of assets you want to deposit in the input field
- The interface shows your current wallet balance for reference
- Use the "Max" button to deposit your full balance
- Ensure you meet minimum deposit requirements
- Keep some SOL for transaction fees
Asset Exchange Information:
- The interface displays exchange rates (e.g., "1 JitoSOL ≈ 0.998 ezSOL")
- Shows how much VRT tokens ("To Receive") you'll get for your deposit
- VRT amounts represent your proportional share in the vault
Multi-Asset Vault Considerations:
- If the vault supports multiple assets, choose which tokens to deposit
- Check the vault's current asset allocation targets
- Consider any rebalancing that may be needed
Step 5: Review and Confirm
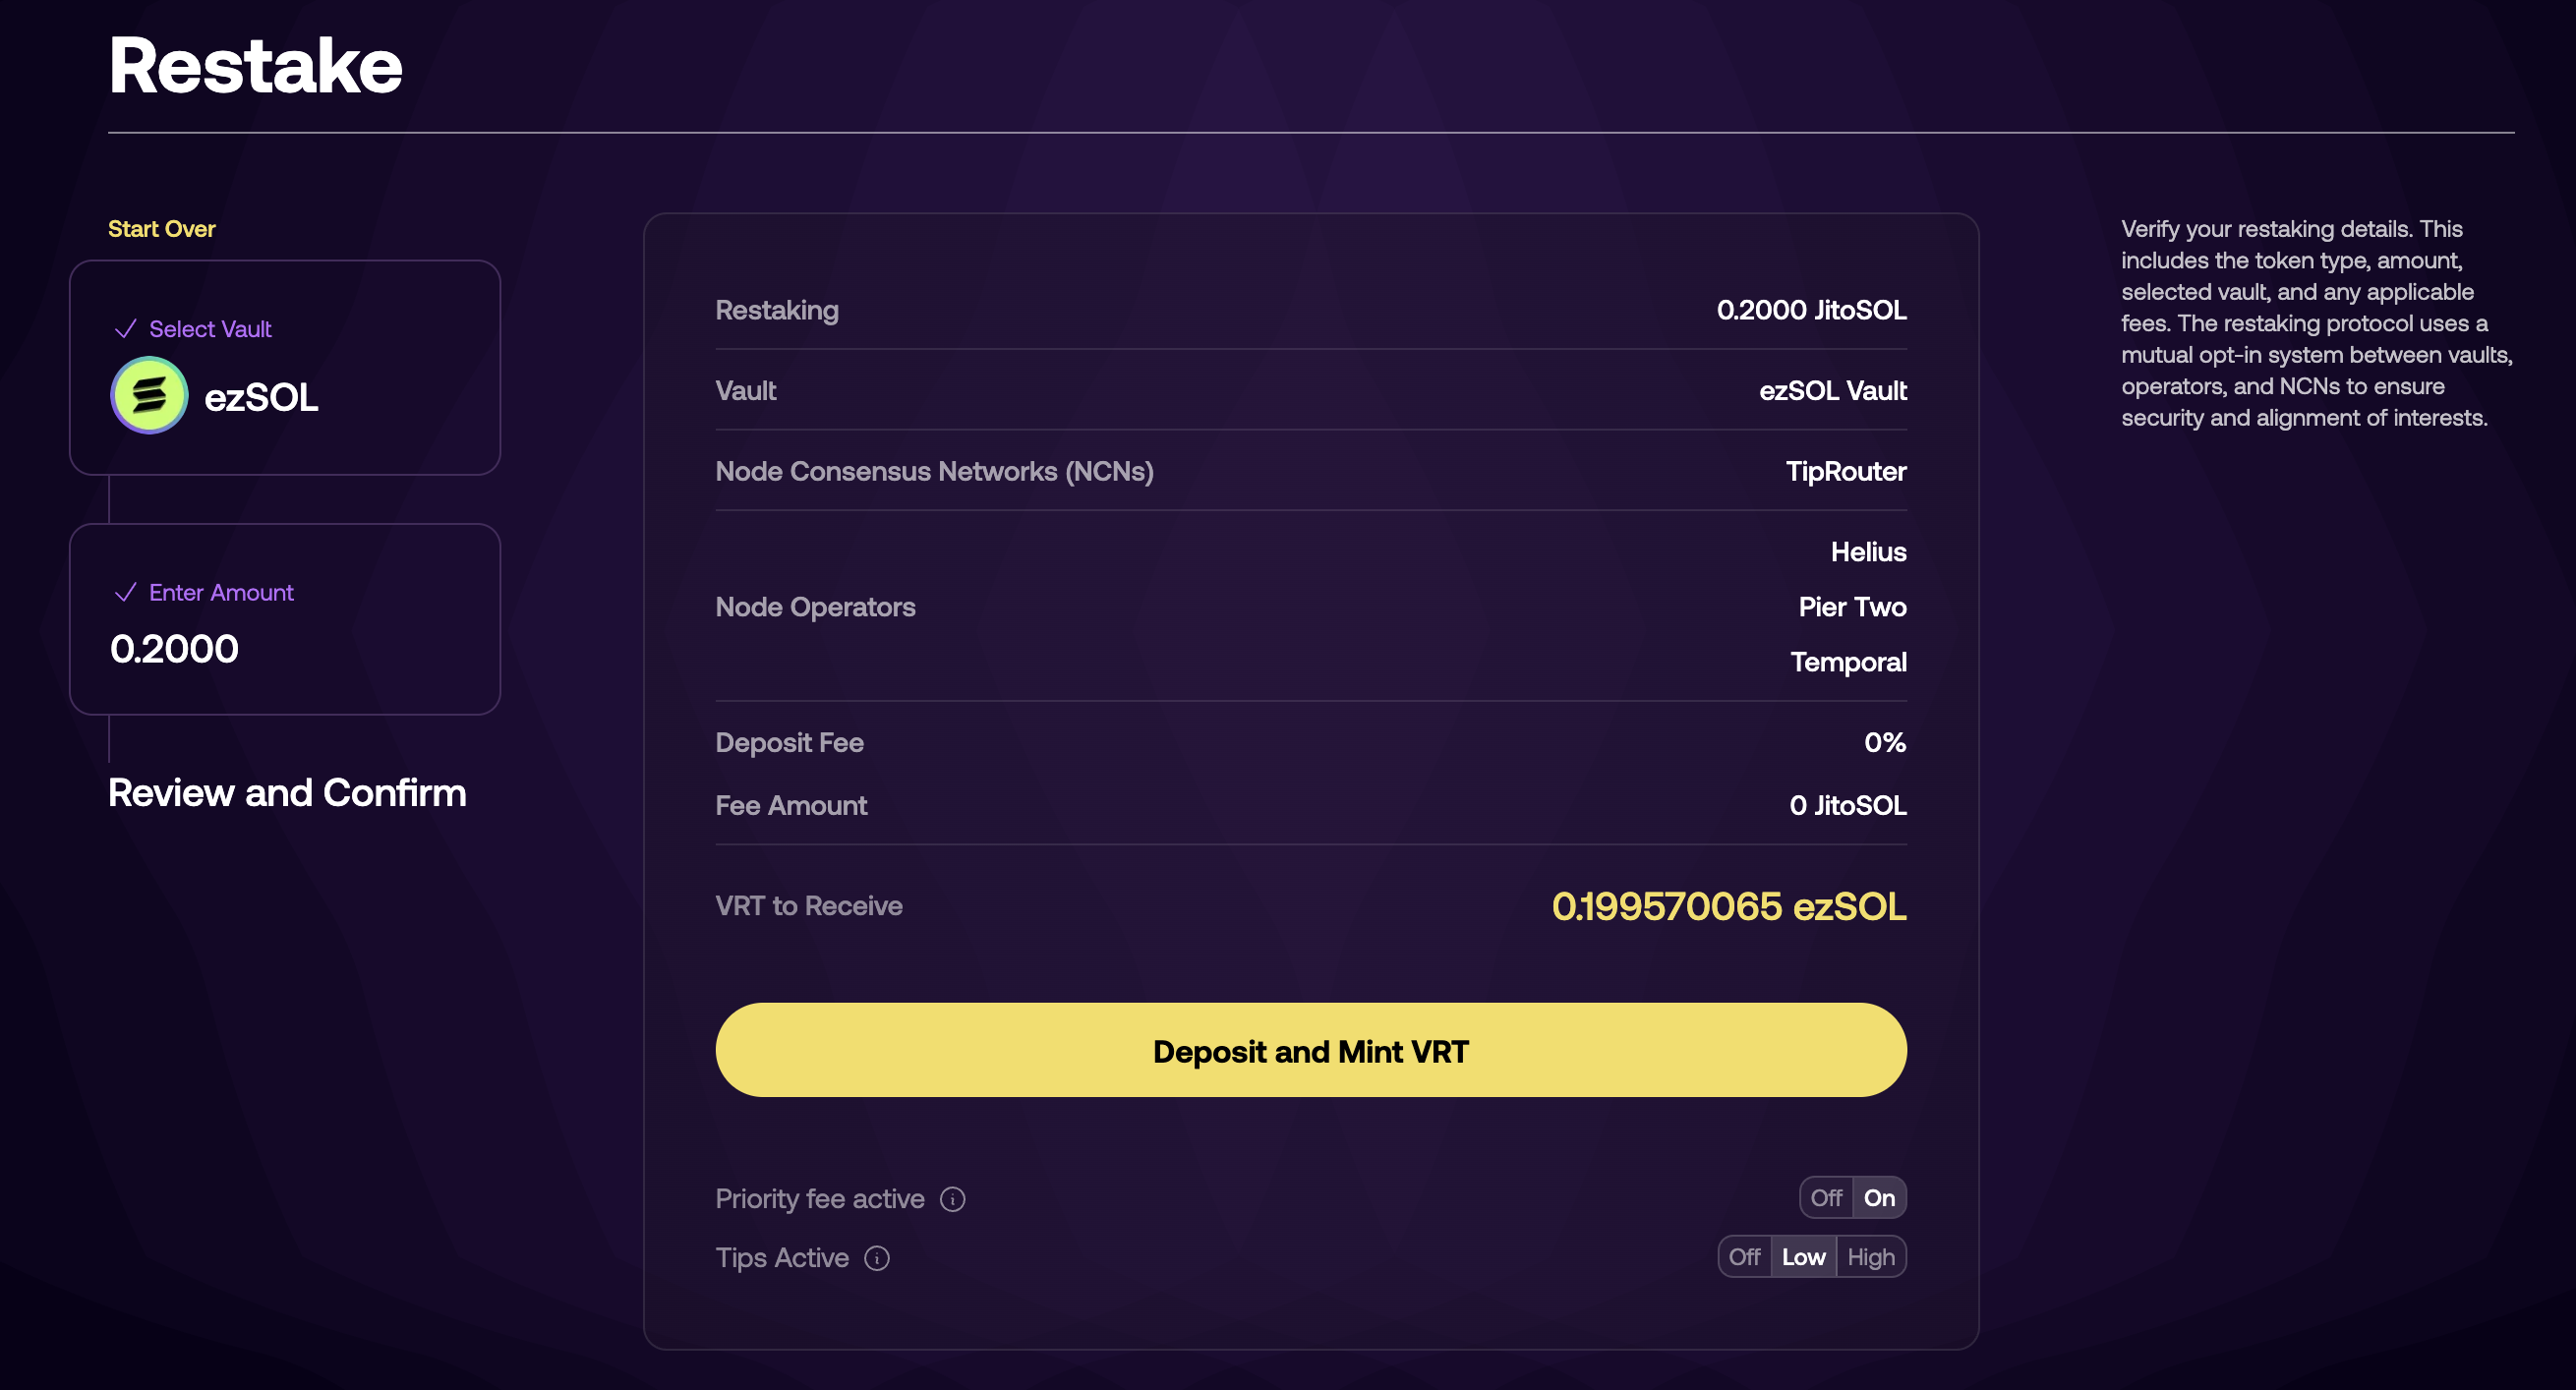
Review Transaction Details:
- Verify your deposit amount and selected asset
- Check the vault details including NCNs and Node Operators
- Review deposit fee (often 0% as shown)
- Confirm VRT tokens you'll receive (e.g., "0.199570065 ezSOL")
- Note any applicable fees
Vault Information Display:
- Node Consensus Networks (NCNs): Shows which networks your deposit will help secure (e.g., TipRouter)
- Node Operators: Lists the infrastructure providers (e.g., Helius, Pier Two, Temporal)
- Deposit Fee: Usually 0% for deposits
- Fee Amount: Shows exact fee calculation
Execute Deposit Transaction:
- Click "Deposit and Mint VRT" to proceed
- Your wallet will prompt for transaction approval
- Pay the required transaction fees (in SOL)
- Wait for blockchain confirmation (usually 2-20 seconds)
Step 6: Verify Your Position
Check Your VRT Balance:
- VRT tokens should appear in your wallet automatically
- Verify you received the expected VRT amount based on your deposit
- Note the VRT token address and amount for future reference
- VRT tokens represent your proportional share of the vault
Access Your Dashboard:

- Navigate to jito.network/restaking/dashboard/
- Your dashboard shows all active positions under "My Vaults"
- Each row displays:
- Vault Name (e.g., bzSOL Vault, rstSOL Vault)
- VRT Balance (your vault receipt tokens)
- Staked Asset Equivalent (underlying asset amount)
- USD Value of your position
- Initiate Withdrawal button for each position
Position Tracking:
- Monitor your underlying asset allocation within each vault
- Track position values and equivalent asset amounts
- Watch for vault strategy changes or announcements
- Use the dashboard to manage multiple vault positions simultaneously
Understanding Your VRT Tokens
What VRTs Represent:
- Your proportional ownership share of the vault's total assets
- Proof of deposit in the restaking protocol
- Claim on underlying assets and any accrued rewards
- Required for managing your position and future withdrawals
VRT Token Usage: Your VRT tokens can be:
- Held to maintain your restaking position and earn rewards
- Used in supported DeFi applications for additional yield opportunities
- Transferred between wallets if needed for management
- Burned to withdraw your original assets (with two-epoch cooldown)
Important VRT Guidelines:
- Store VRT tokens securely in your wallet
- Never lose access to your VRT tokens (they're required for withdrawals)
- Check compatibility before using VRTs in external DeFi protocols
This guide covers the basic deposit process. For withdrawal instructions, see the Restaking Withdrawal Guide. Always do your own research and understand the risks before depositing significant amounts.